

Create your team
Name your club, team, division, and season. Create your team →
Invite your staff
Add other coaches and helpers (optional). Invite your staff →
Add your roster
Add players — name, jersey number, birth year, position. Add your roster →
Send consent requests
Ask each player’s parent for consent. Send consent requests →
Activate your trial
Start your free 7-day trial — no card required. Activate your trial →
Capture your first note
Record a note and watch RinkNotes write it up. Capture your first note →
You can’t capture a note about a player until that player’s parent has granted
consent. Sending consent requests early (step 4) gives parents time to respond
before your first game.
Running a skills camp or a tryout instead of a season team? The setup is a little
different — see Teams, camps & tryouts.
What you’ll be able to do
Once you’re set up, day-to-day RinkNotes is three things:Capture
Speak notes during a game, practice, or anytime.
Review
Confirm what RinkNotes wrote in your live feed.
Outputs
See player feedback, game stats, and action items.
On the iOS app, your outputs live under the Insights tab; on the web workspace they’re
split across Dashboard, Games, Practice and each player’s page under Roster & Consent.
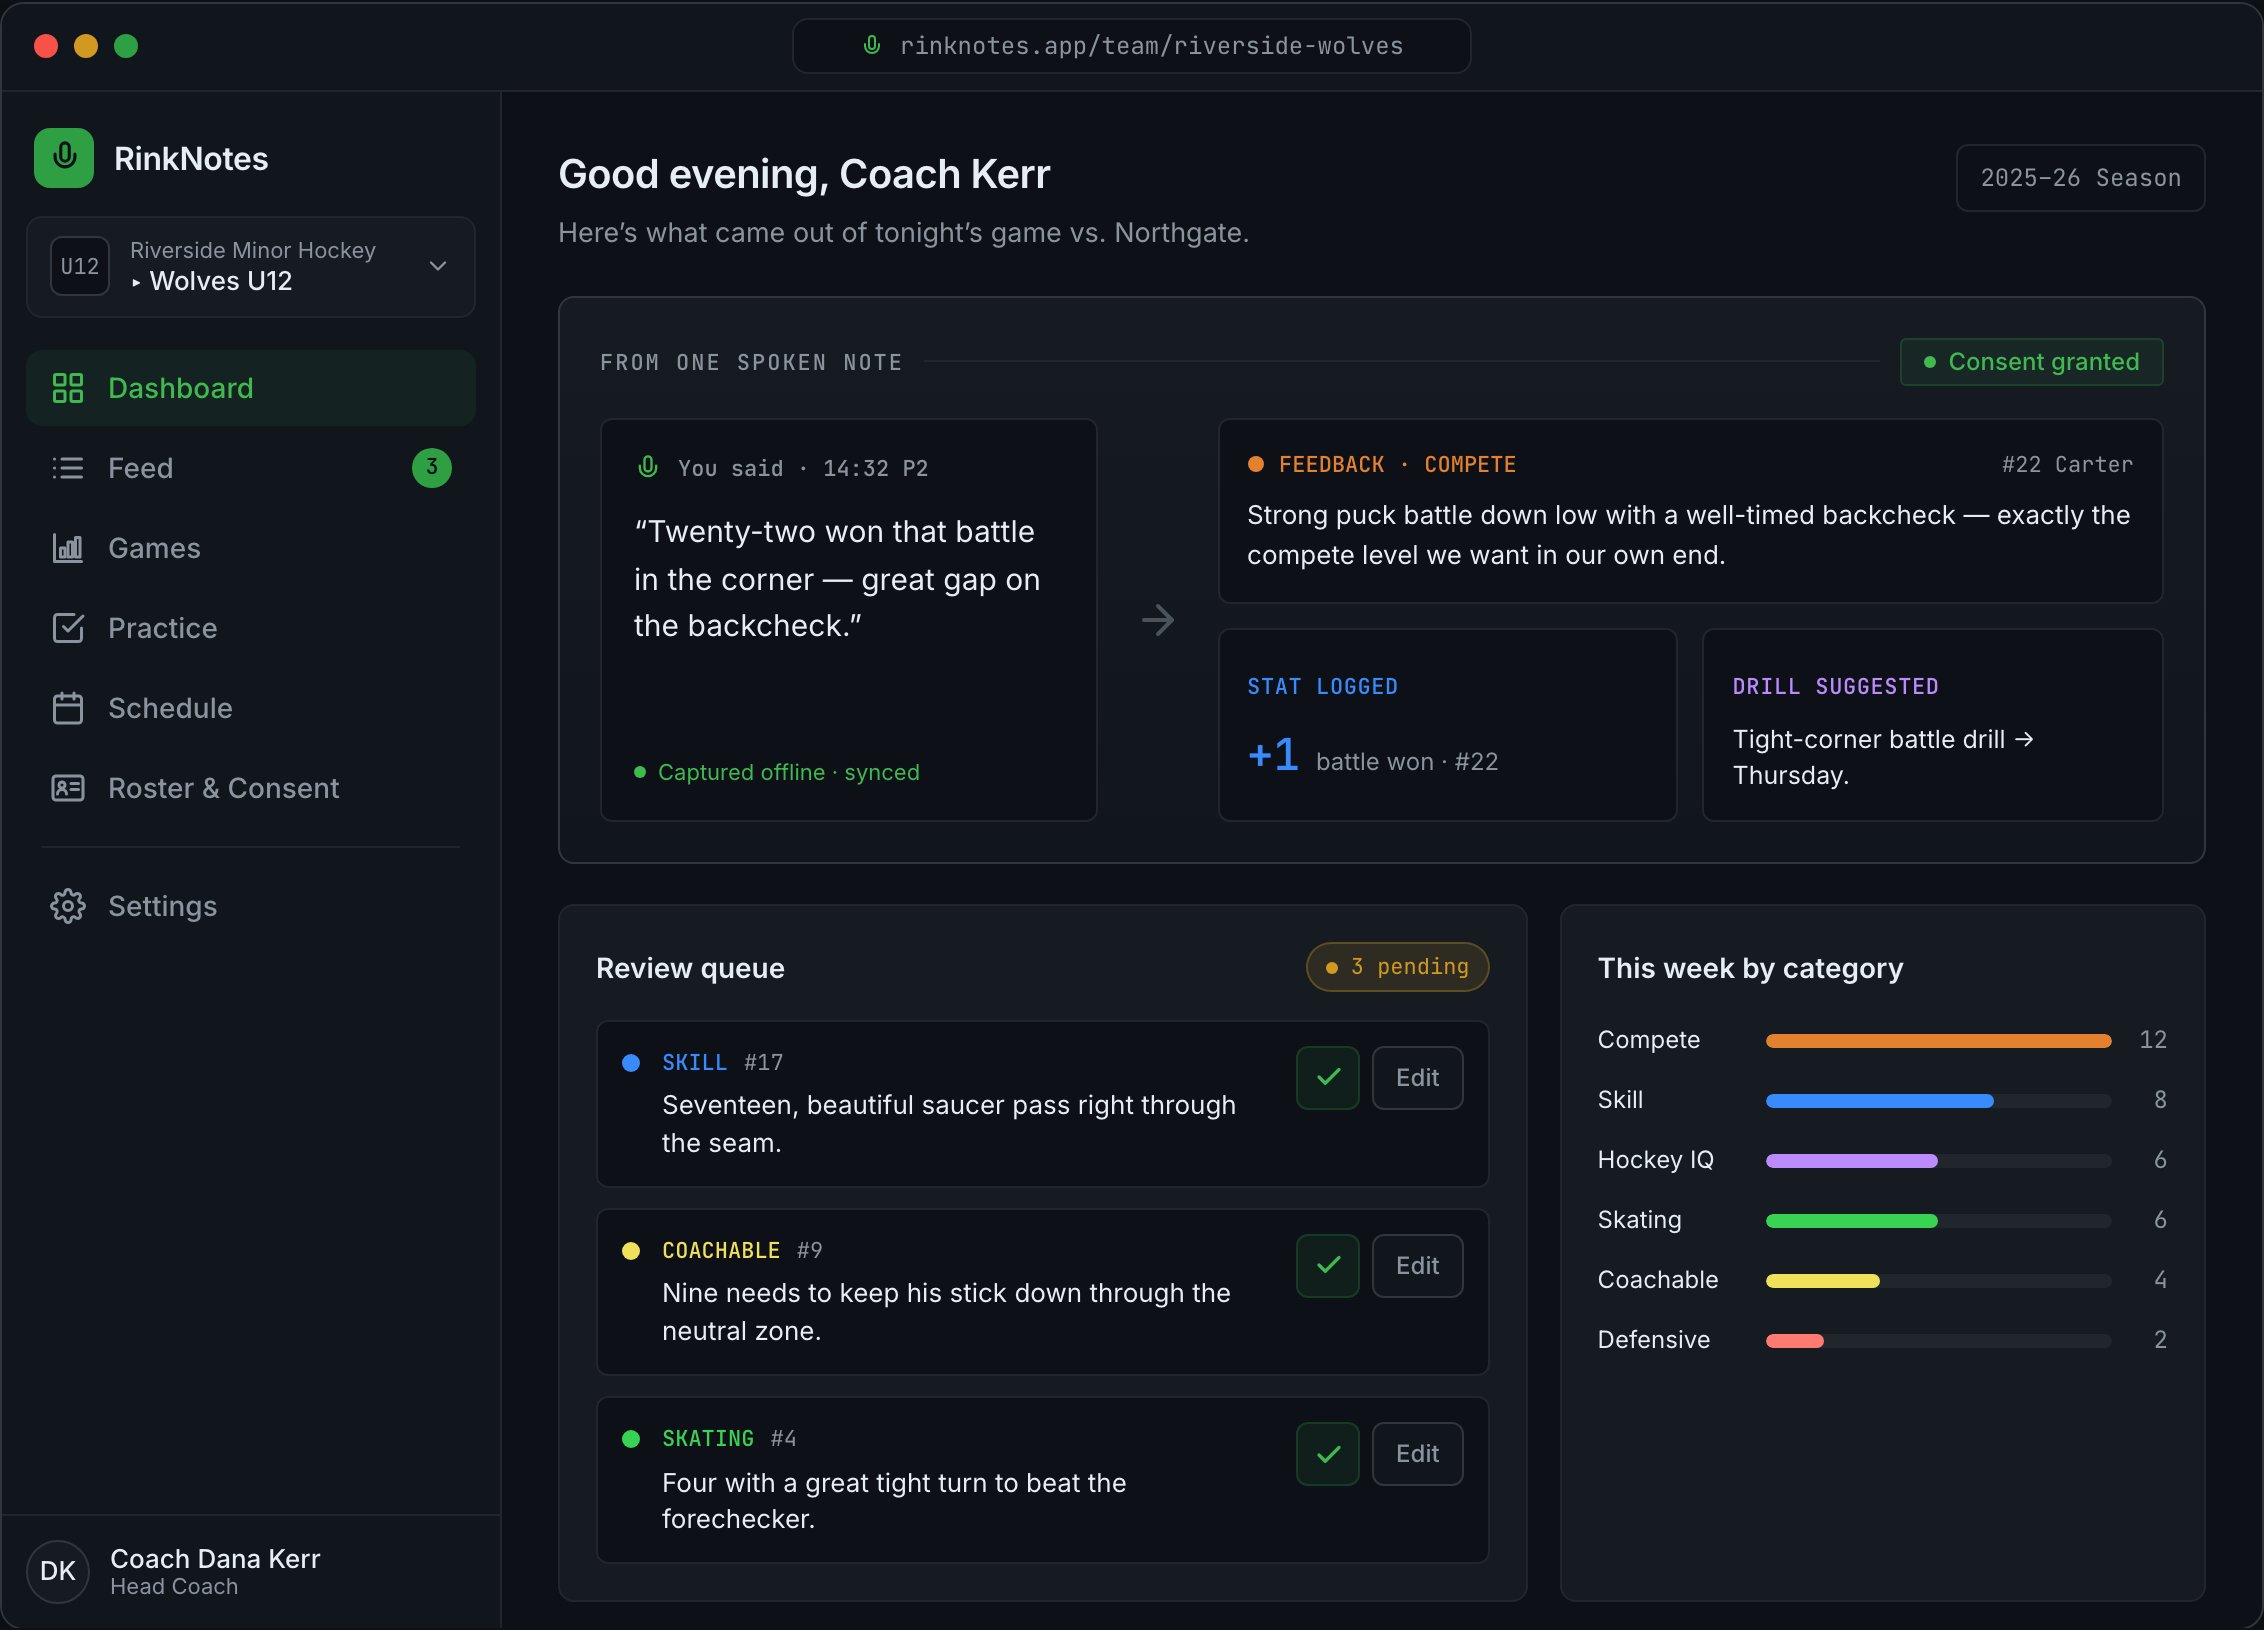
Where it lands: the web workspace. One spoken note on the bench becomes feedback, a stat, and a drill — plus a review queue and a weekly read on your team.